
|
|
Modifications
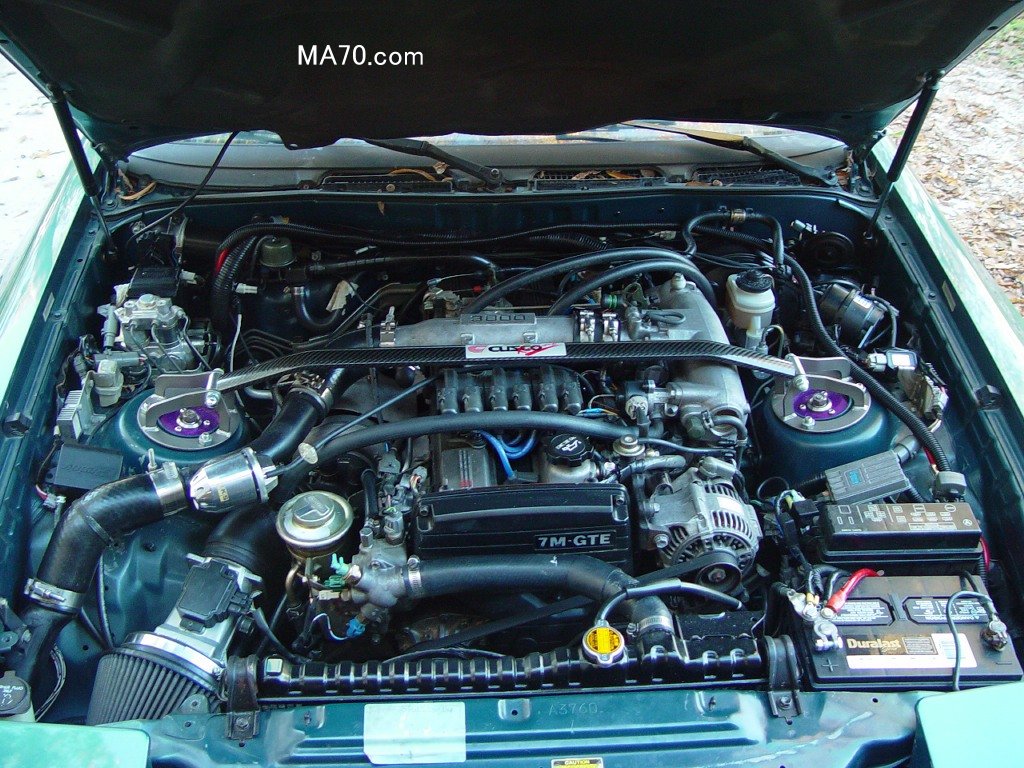
Archive of engine bay shots (dialup users beware)
Engine Performance Mods
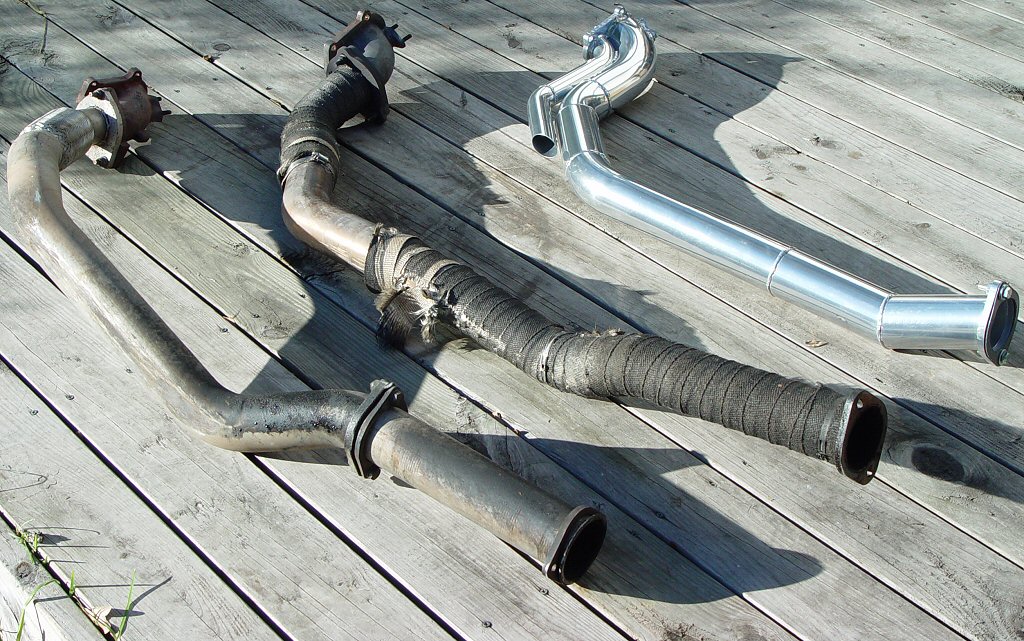
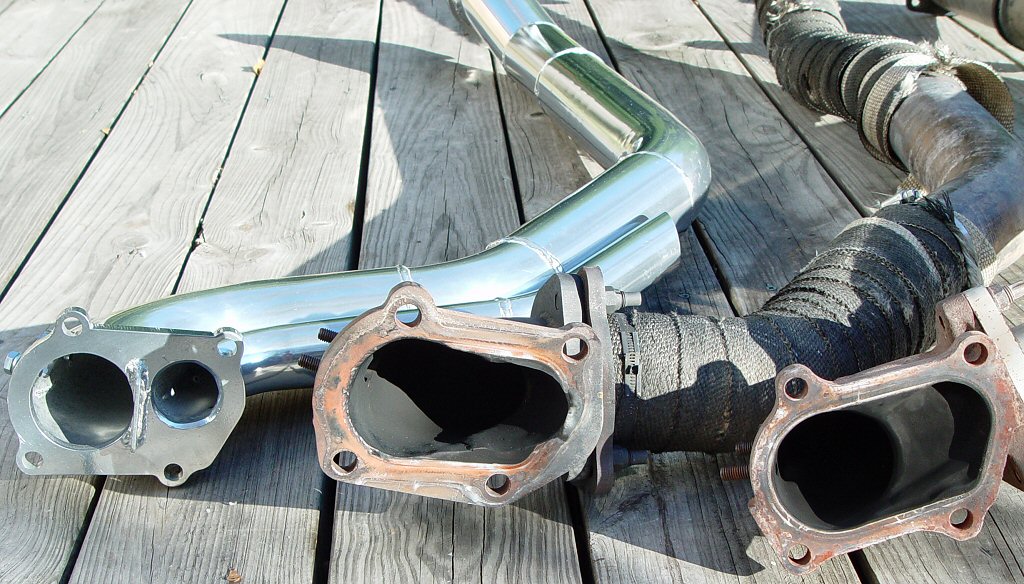
- BIC DDP - "becauseican" divorced downpipe. It separates the wastegate exhaust stream from the turbo exhaust wheel stream thus ridding the exhaust of a lot of turbulance. This allows the turbo to blast exhaust out into a full 3" mandrel bent pipe and the wastegate has a separate 1.75" pipe. My particular DDP is also ceramic coated for more heat and corrosion protection. The only disadvantage, if you want to call it such, is this downpipe is loud when full boost hits. Basically you're hearing the engine sounds without the turbo to muffle it. video 1 video 2 You can see more of it on Randy's (becauseican) website See some pics of the BIC DDP compared to my old setup which was the AMS O2 housing + RT dual cat delete DP, also compared to an HKS DP - pic 1 pic 2 the openings
- CT-26 57 trim turbo upgrade Mild turbo upgrade but pretty respectable power. 57 trim compared to stock Look at the wheel sizes, that few mm doesn't seem like much but in the turbo world that's a good 100rwhp gain.
- GReddy Profec e-01 electronic boost controller. This bad-boy can control the e-Manage, run more boost then my Profec B (3 bar vs 1.5), and data log up to 3 inputs for three hours. It also can control boost based on RPM for steady boost. All this on a LCD screen with EL backlighting. Pics to come...
- HKS 3000 pipe Painted the indention teal instead of red
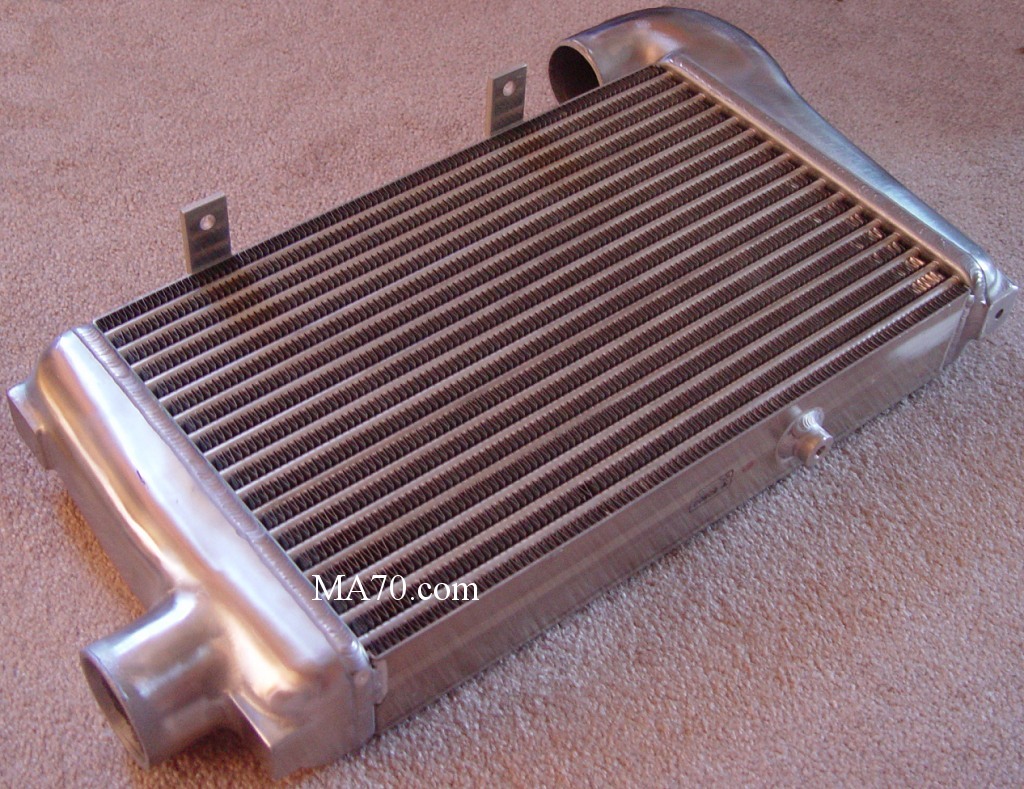
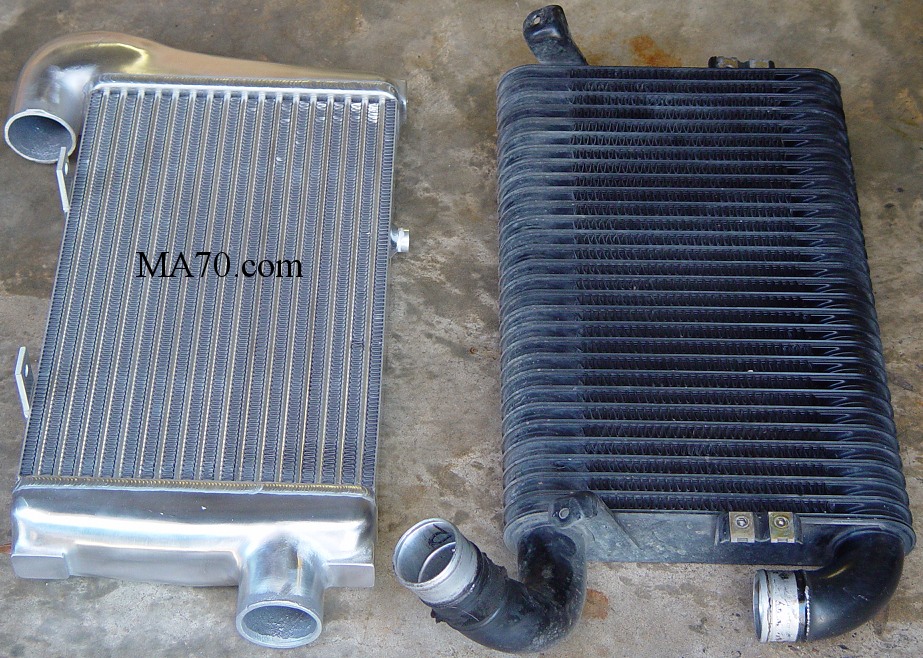
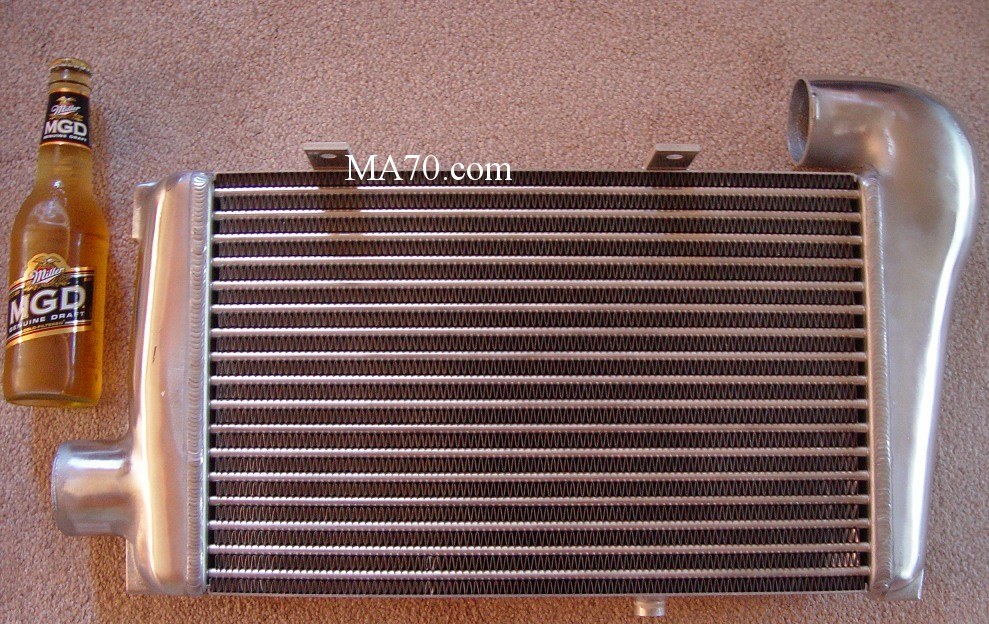
- HKS Intercooler and Hardpipes The essential upgrade to making good reliable power with a larger turbo. The difference is instantly noticeable. Power comes on much quicker and hits harder then ever. The intercooler is just a bit longer and taller then the stocker but is about twice as thick and the core is a much better design. When it comes to intercoolers, bigger is not always better. Core construction and end tank construction is everything. HKS IC by itself the entire kit HKS vs stock another shot of the IC latest engine bay shot
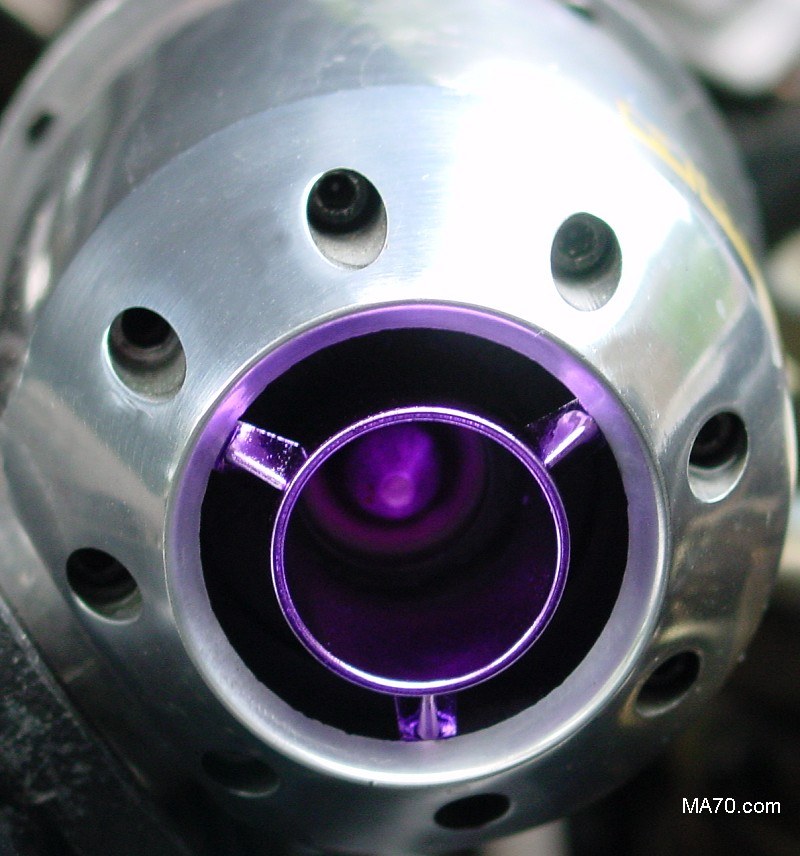
- HKS SSQV BOV What can I say, this provides not only fun but safety for my turbo and power (vs leaking stocker). The fun is when I blow-off it is pretty loud. blowing off under a bridge or in a tunnel is fun I put the purple insert which is supposed to lower the pitch, it just changes the way the high boost valve sounds. Tends to make it much quieter, I decided I liked the high pitched noise of the OE insert so I put it back in. Pic of the purple insert Pic of engine bay with SSQV
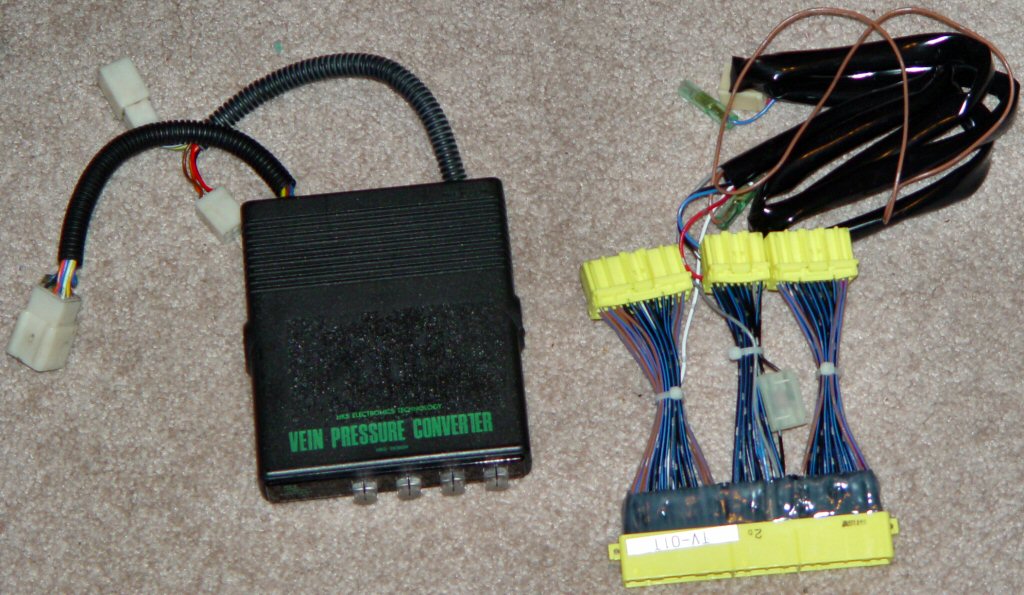
- HKS VPC Basically this device translates a MAP sensor (5v) signal into the Karman Vortex (Hz) signal that the ECU can understand. This allows me to remove the stock AFM and put a filter directly on the turbo, or run the turbo open with no filter in special conditions. It's pretty old technology but together with the e-Manage it works like a champ. No more BOV stalling, rough Lexus AFM idle, and if an intercooler hose blows off I can still drive the car. I opted to buy the VPC harness since the price dropped under $200 recently and it's nice to plug and play and not cut up my stock harness. Pics of VPC main unit and harnes I used this to replace my Lexus AFM Lexus vs stock afm
- K&N FIPK (Filtercharger Injection Performance Kit) for better air flow PIC.
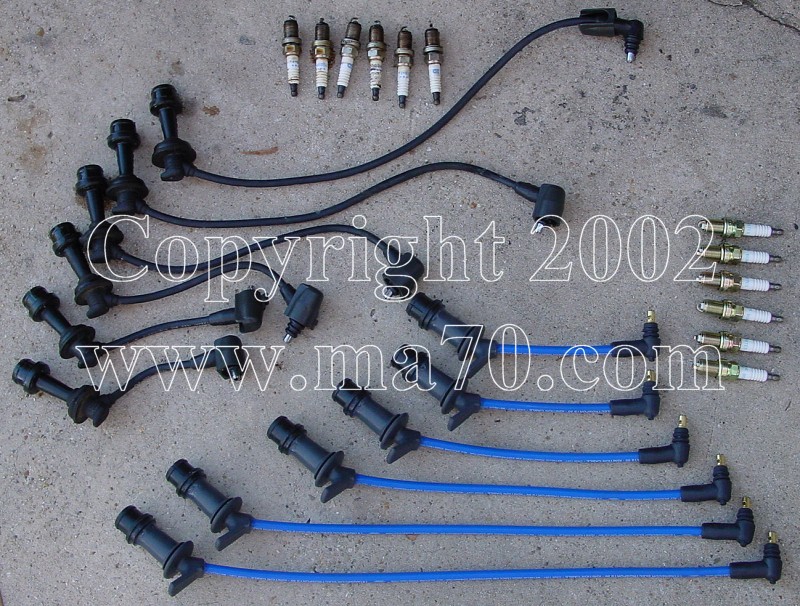
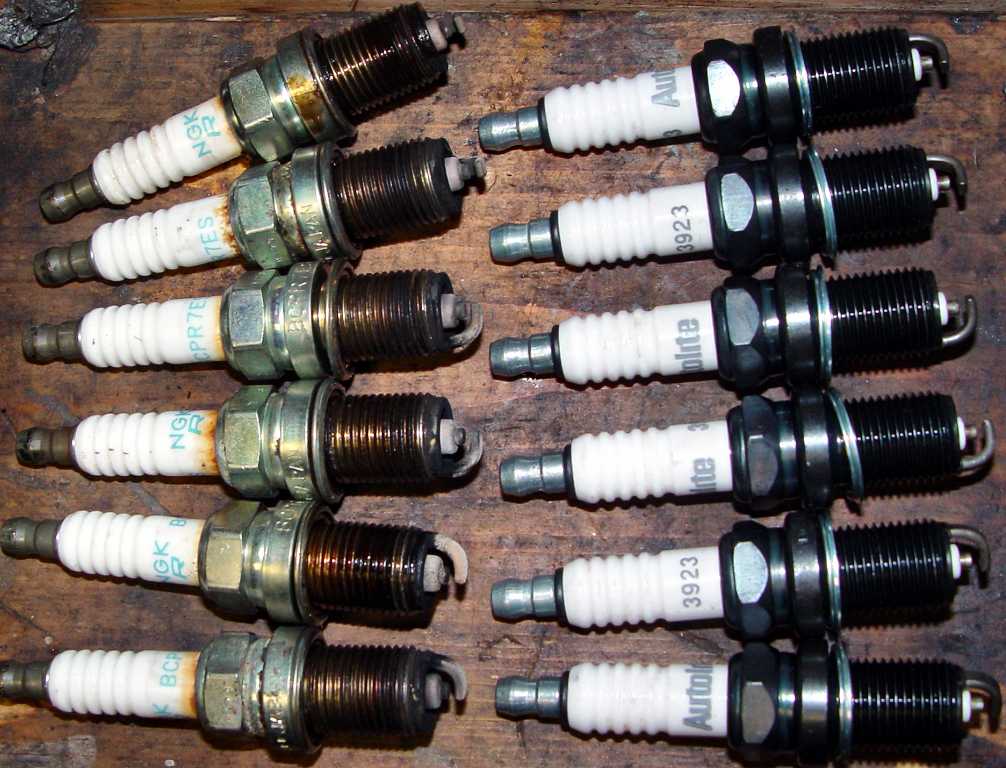
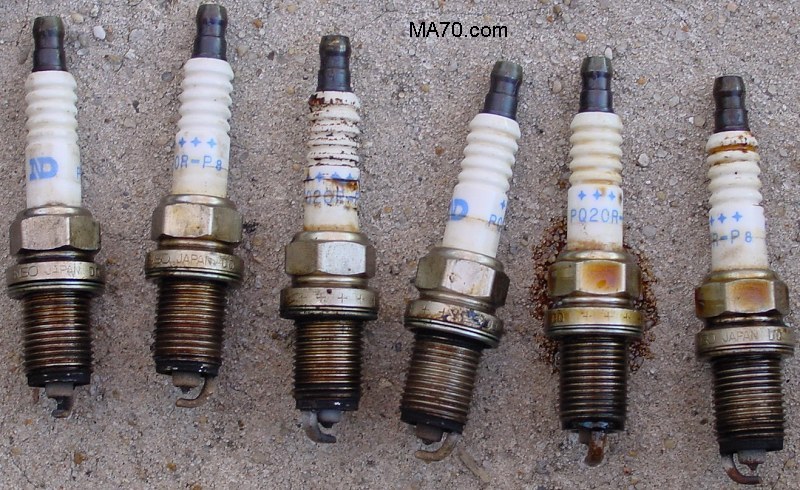
- Magnecor 8mm wires with Autolite Copper spark plugs. Magnecor 8mm with NGK coppers Autolite copper vs NGK copper plugs orginal plugs vs NGK copper and see a picture of the engine bay here.
- Nippondenso 550cc injectors After lengthy discussions with a few EE's I decided the delay from using a high impedance injector with the stock resistor pack bypassed was unacceptable. With these low impedance 550's I have the exact same reaction time as the stock injectors. I had Dave perform the splice and dice. We did the high impedance hack n sack bypassing the resistor pack on his 89. Both cars run excellent, only time will tell if low impedance were even necessary. Pic of stock vs ND
- Perma-Cool 14" electric fan Frees up a good bit of rotating mass, especially when the car is really hot. Unfortunately I had to remove this fan. The combination of the larger IC blocking airflow, the hot summers here and trying to run AC was too much for the single fan to handle. At this point the extra power the electric fan gives just isn't worth not running the AC. See a pic
- Perma-Cool oil cooler upgrade The barbed ends are a good bit larger and flow much better than the stock cooler. Also the surface area on the Perma-Cool cooler is over twice what the stock cooler has. You can see a picture of the two compared here.
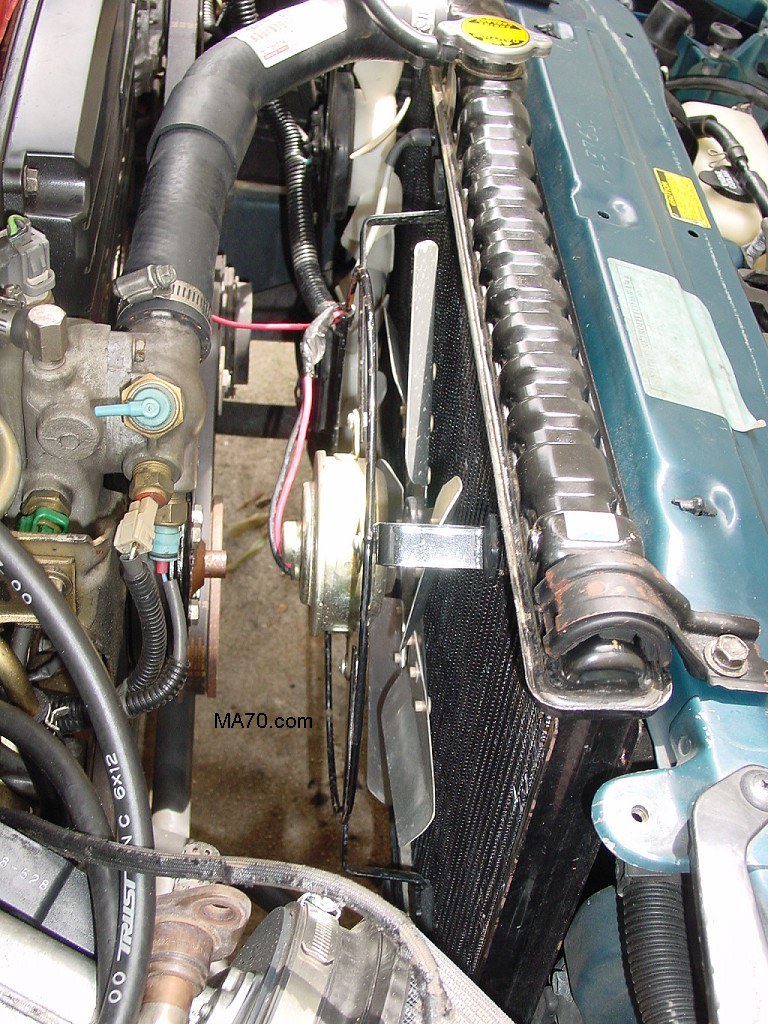
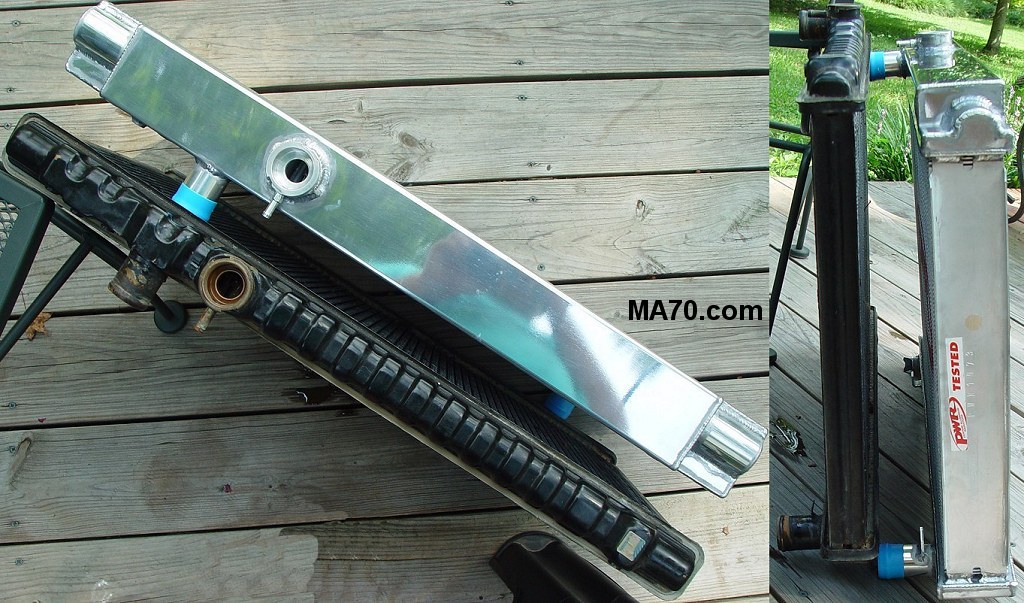
- PWR Radiator made for the MK3. Fits in the stock brackets, uses stock hoses, has the mounting points for the fan shroud and stock electric fan(s). Coolant temps dropped 10-20C on average, really dresses up the engine bay too. Only complaint is it is f-n hard to keep clean and polished. I've got a GReddy 1bar radiator cap and a PWR 14psi cap, currently the GReddy one is installed. Pics: installed compared to stock rad compared to stock rad
- T-Bolt hose clamps on all the intercooler hoses. I got tired of the horrible design of the stockers which would leak boost like mad so I went to the local NAPA and got a full set for ~$3/each. See a pic of the engine bay with the new clamps here.
- ThermoTec heat wrap placed around the upper intercooler pipe. Reduces intake charge temperature for cooler and more dense air. installed pic
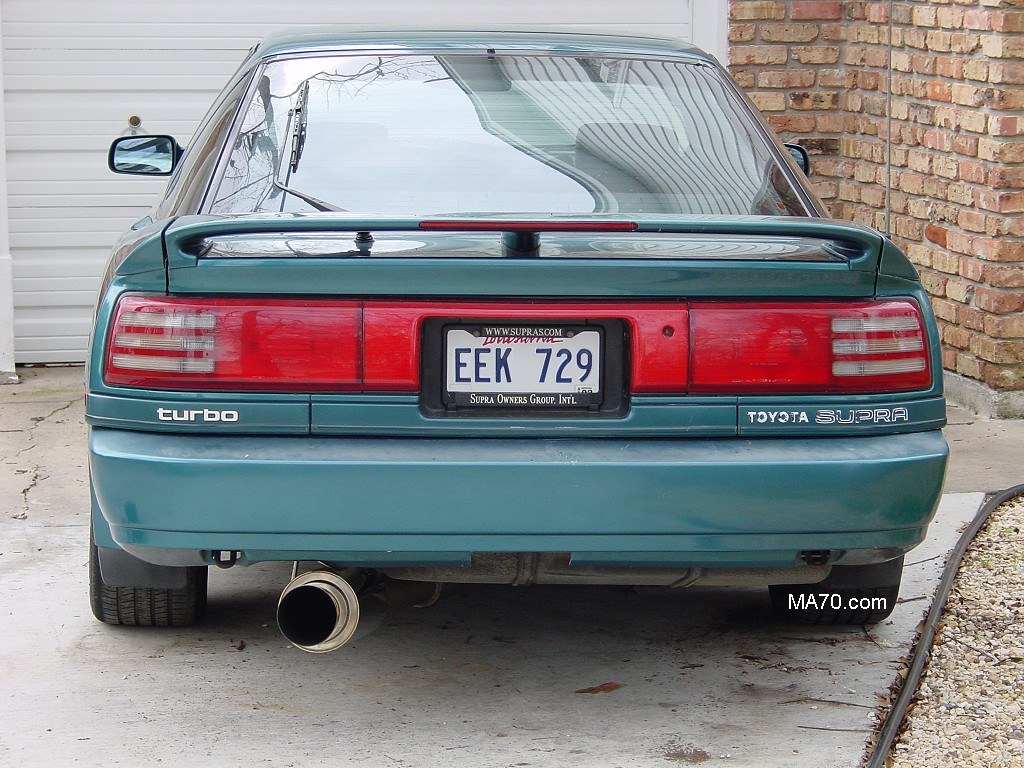
- Trust, or GReddy as it's called in the states, 80mm cat back (Power Evolution 2) imported from Japan. This is a very nice piece, well worth the money spent to import. Pictures: Rear view of the PE2 Underside view of the PE2 and downpipe Sounds: Before the downpipe After the downpipe (sounds much better) Coming soon: flybys and movies :)
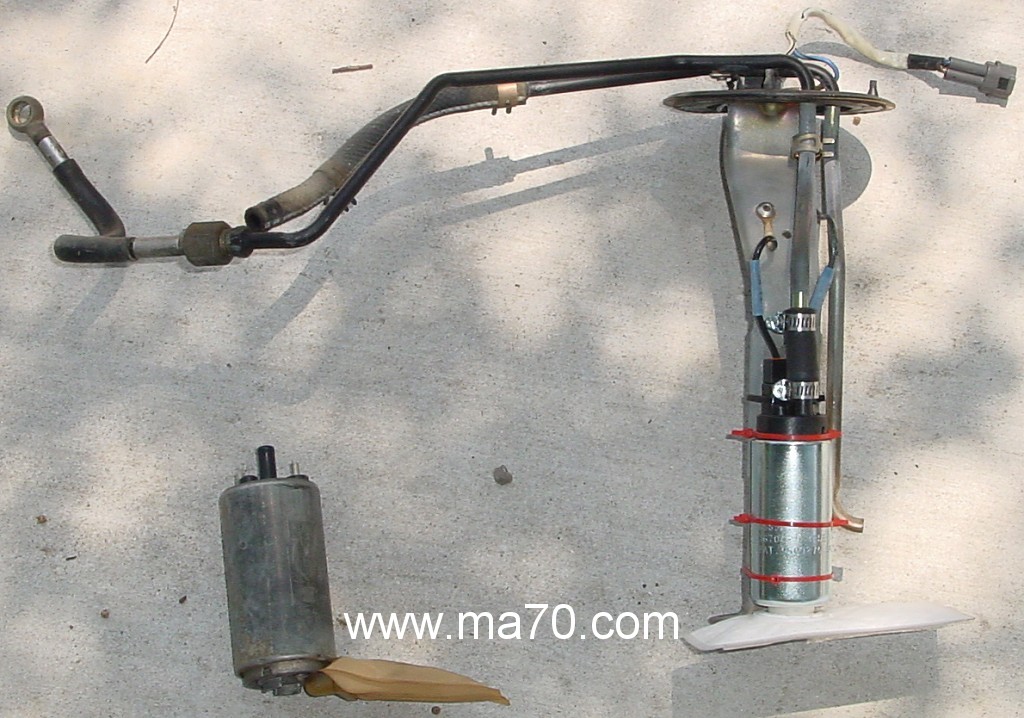
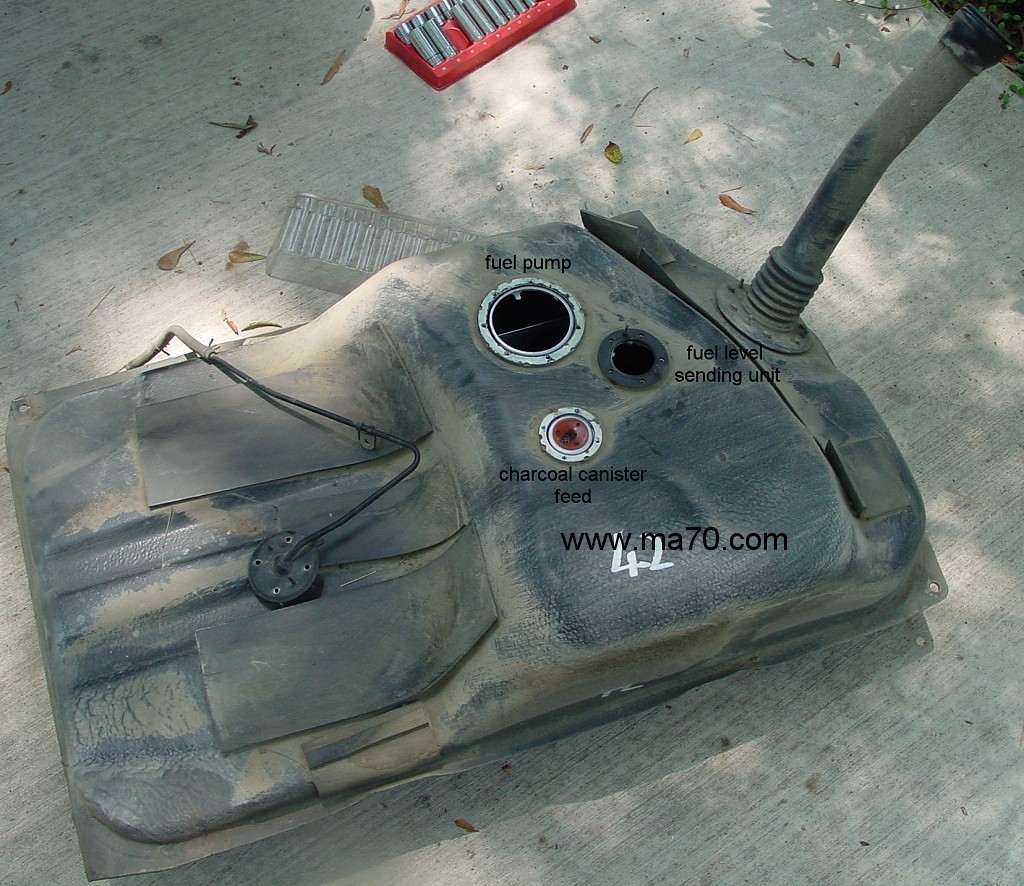
- Walbro fuel pump 255lph, fits right into the stock location. Easiest way to do this is while doing a fuel filter change. More than likely your fuel level sender is dirty and needs cleaning like mine so might as well do a 3 for 1. Notice where the arrow points to, that should be shiny, get some electronic parts cleaner and a tooth brush and get it shiny. Also make sure the swinging arm contacts the wires through the entire travel. So I drove around until my fuel light was on and then drove another 10 miles. Next day I dropped the tank, I find it's easier to let it down some and then open the fuel level sender access panel in the hatch. Use that access panel to unhook the fuel pump harness, much easier than trying to reach over the tank. More pics: stock fuel pump vs Walbro fuel tank off the car
- Misc free mods - Coolant lines that ran through the throttle body and ISC valve were rerouted, EGR system removed, rerouted the PCV system to keep my intake track free of oil, and removed the charcoal canister. Also removed the 91-92 style PS coolers, not by choice though the HKS IC kit wouldn't fit with the coolers in place :P
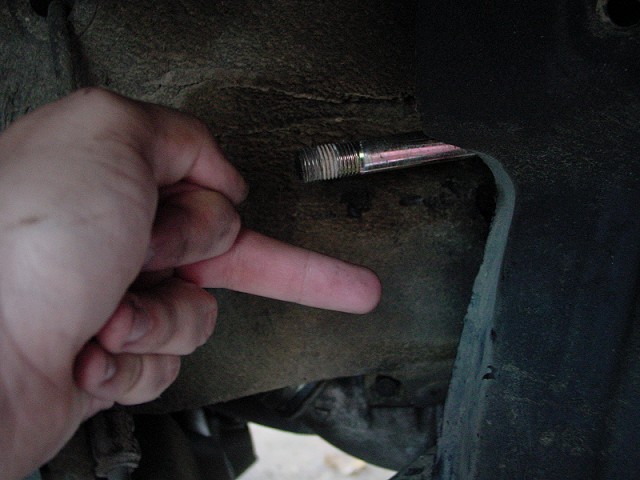
Suspension Mods (to the Toyota engineer who designed this bolt, click here)
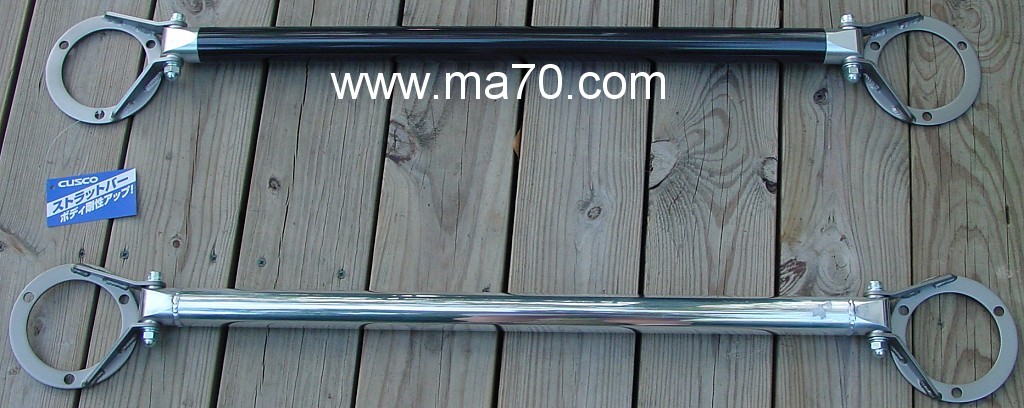
- Cusco Carbon Fiber front strut tower bar also known as ALC OS in Japan (ALuminum Carbonfiber Oval Shaft, I think). I imported this piece from Japan. See a pic here and a closeup here
- Cusco Carbon Fiber rear strut tower bar I decided the regular aluminum oval shaft one wasn't enough for me. The Yen was down so I just couldn't pass it up :) Unlike my front one this one is pure carbon fiber and 40mm! Unfortunately there isn't enough clearance for a 40mm bar in the front. This strut tower bar is amazingly light and stronger than the aluminum one. Here's a pic of my CF one versus an imported 40mm aluminum bar: pic
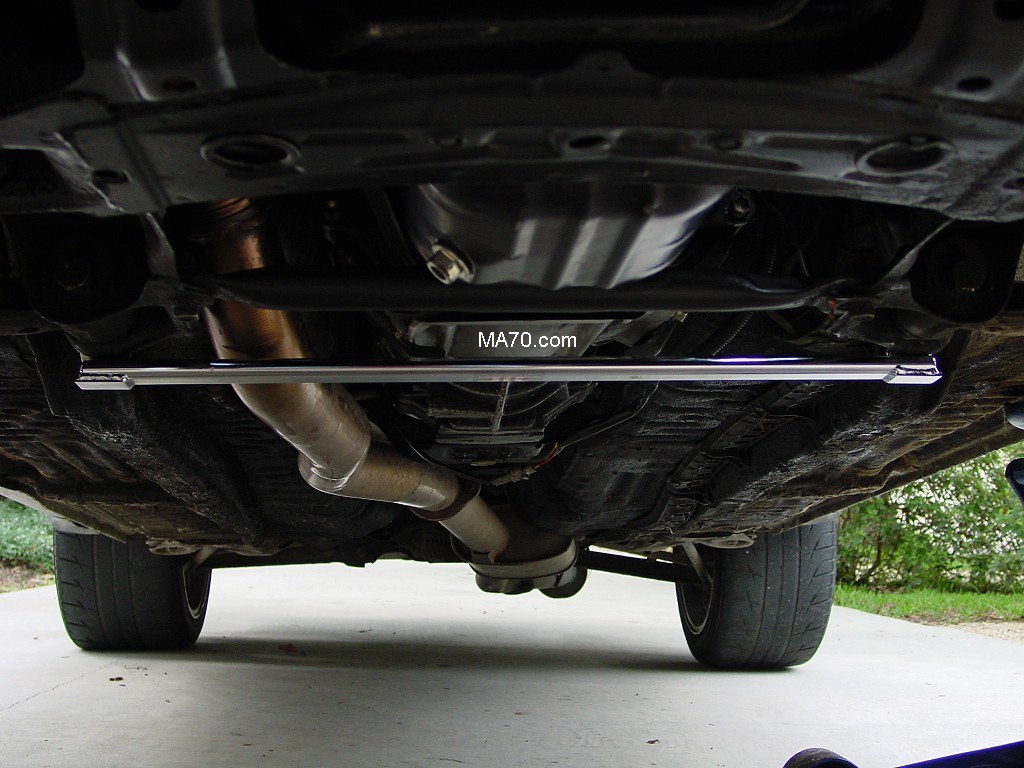
- Do-Luck Rear Cross Brace AKA center support bar since it really does go in the center of the car and not the rear. See my Do-Luck page for pictures and installation tips. Targa wobble was noticeably reduced and the car took on a whole new tighter feel. It feels as tight with the roof off as my hardtop 86.5 does.
- JIC Lower Arm Bar Supposed to reduce understeer, and it does to a small degree. I mostly noticed a general stiffening to the frame, nothing spectacular. picture
- Suspension Techniques anti-sway bars
- Suspension Techniques anti-sway bar end links. Pics:
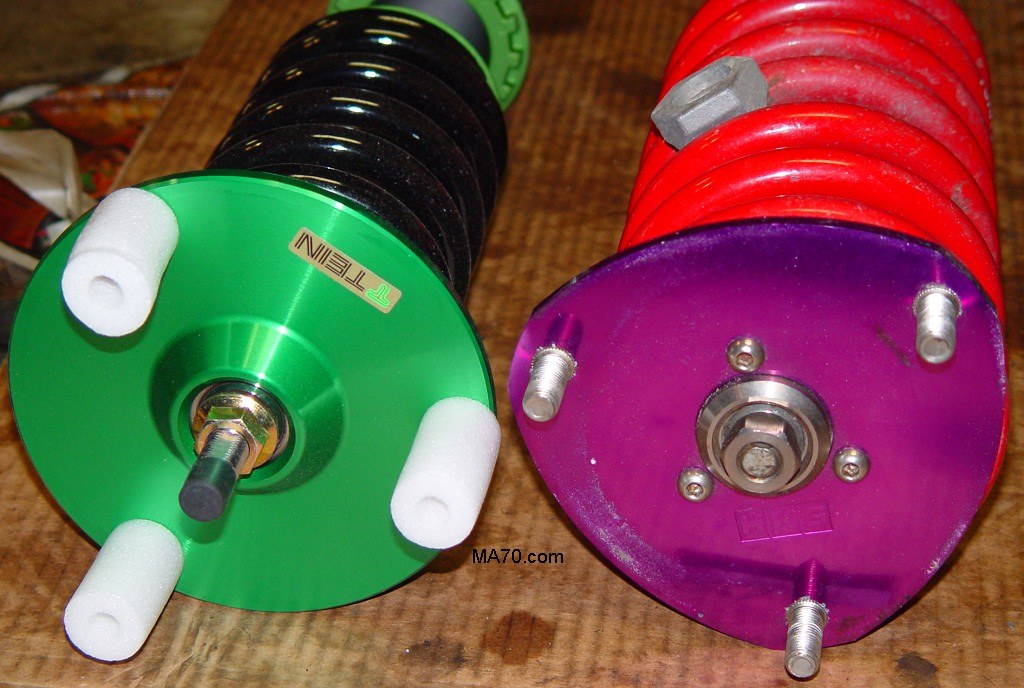
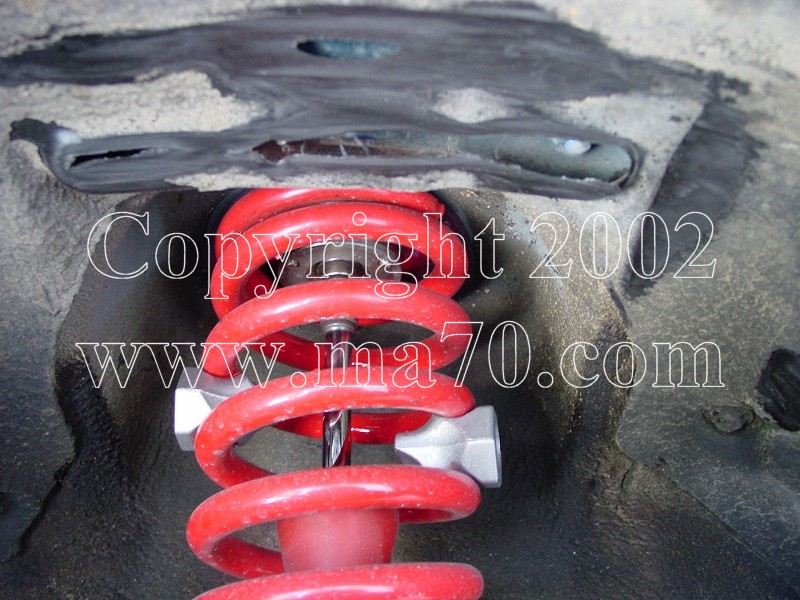
- Tein Flex Coilovers 671 lb linear front and 335 lb linear rear, any rate from 55 lb to 1118 lb is available from Tein. 24 way adjustable rebound and compression fully rebuildable struts. There really is no comparison going from a strut/spring combo to a full coilover setup. The car grips better and stability was increased even more. Even when sliding the car feels like it's completely under control. Perhaps the biggest difference is during hard cornering - if I hit a bump the coilovers keep the wheels planted much better then any spring/strut combo I've seen. It really makes the car more stable in rough corners. Tein Flex before install Tein vs HKS mounts new setup vs old Tein tops from engine bay (old setup - Tokico springs and Tokico HP struts HKS mounts)
- Tein EDFC This lets me control the strut rebound/compression from the cockpit instead of having to manually go to every strut and spin the adjustment knob. See the whole setup
Drivetrain
- ACT Street Clutch Stock clutch was SMOKED as I noticed when I tried to hit 12psi in any gear over 2nd. See a pic of old and new clutches here.
- Aluminum Driveshaft Stock driveshaft is two piece, weighs 34lbs and has a bearing that wears out around every 75k miles. This aftermarket unit is a single piece, weighs 11lbs and will never wear out.
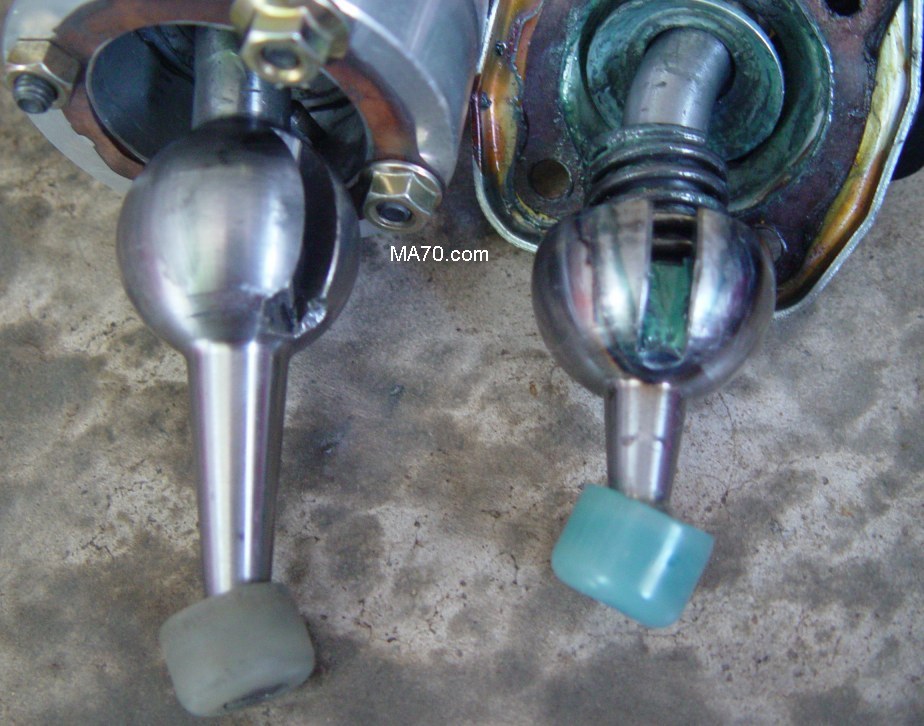
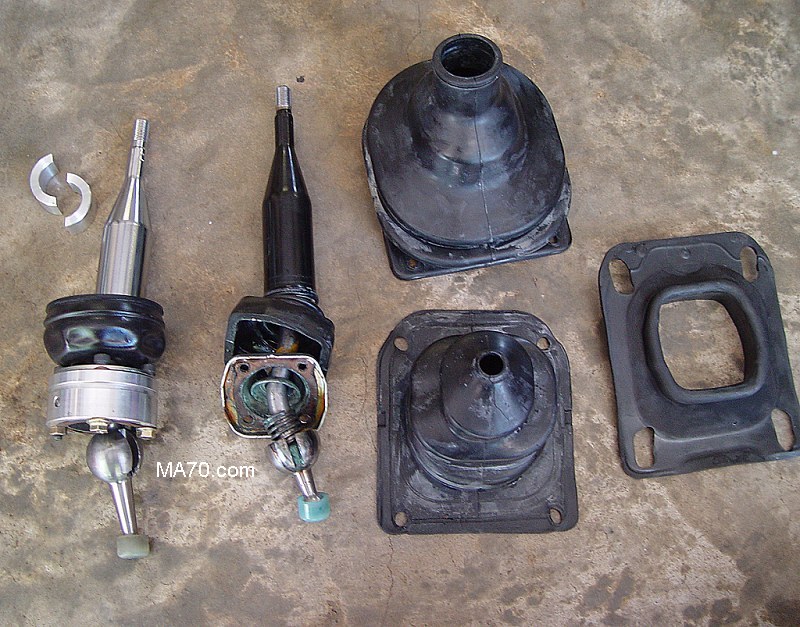
- C's Short Shifter for anyone serious about racing this is a must-have. Throw is approximately 50% shorter then stock. Pics comparing stock to C's: here and here
- Fidanza Aluminum Flywheel weighs in at 11lbs, noticeably lighter than the stock flywheel. Engine revs up quicker now too. See a pic here and here.
Interior Electronics & Visual Mods
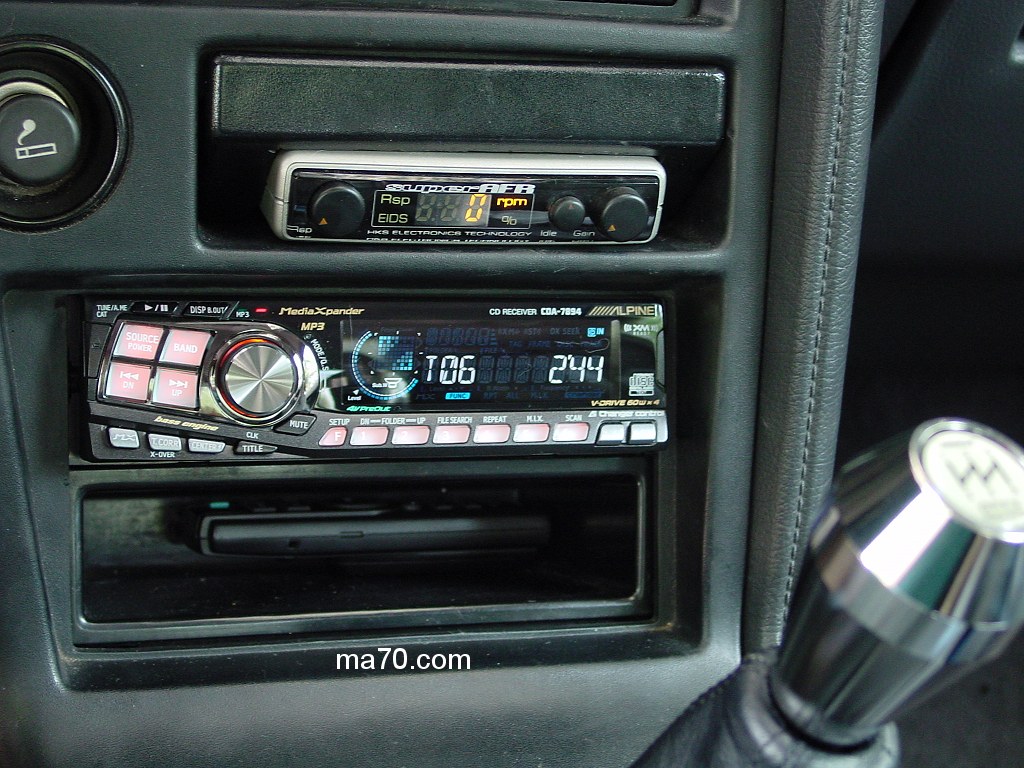
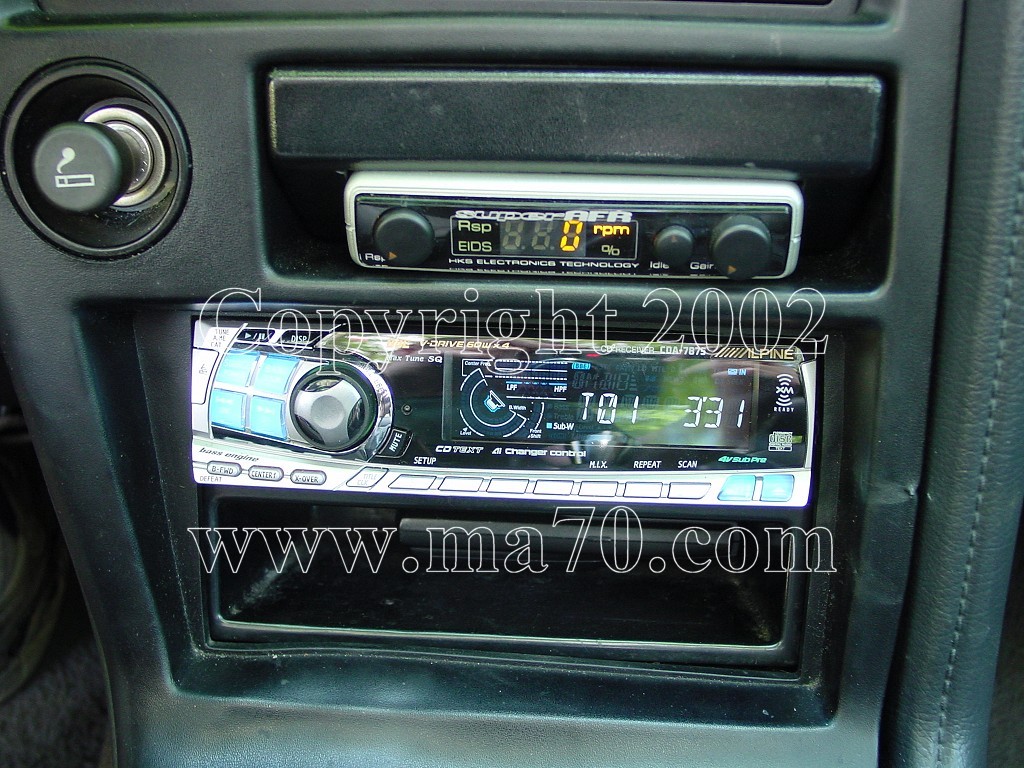
- Alpine CDA-7894 MP3 deck. 60w x 4, dual backlighting, XM/AM/FM/CD, blackout display, LPS, and all kinds of other shit I don't have a clue how to operate yet ;) Alpine MRV-F407, Alpine MRV-100M, Soundstream Exact 6.2 up front, Polk Audio 4" in the rear, 10" in a bandpass, 4 gauge Stinger wire for power and ground, Stinger Hyper series RCA's, Stinger fuse holder, and Stinger distribution block. Pictures: interior overview in the day at night in both illumination modes My former deck Alpine CDA-7875 .
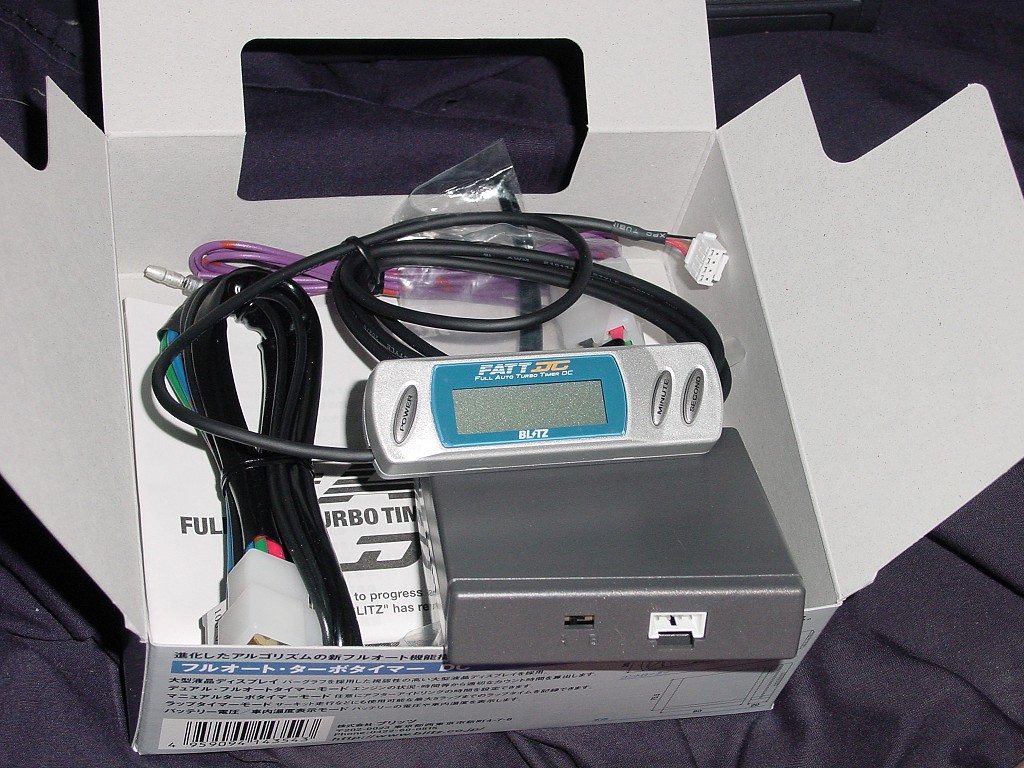
- Blitz FATT DC Turbo Timer - timer plus voltage and temperature displays. DC stands for digital compact and it is pretty compact and easy to mount anywhere. See pics of it here. Not sure where I'm going to locate it yet...
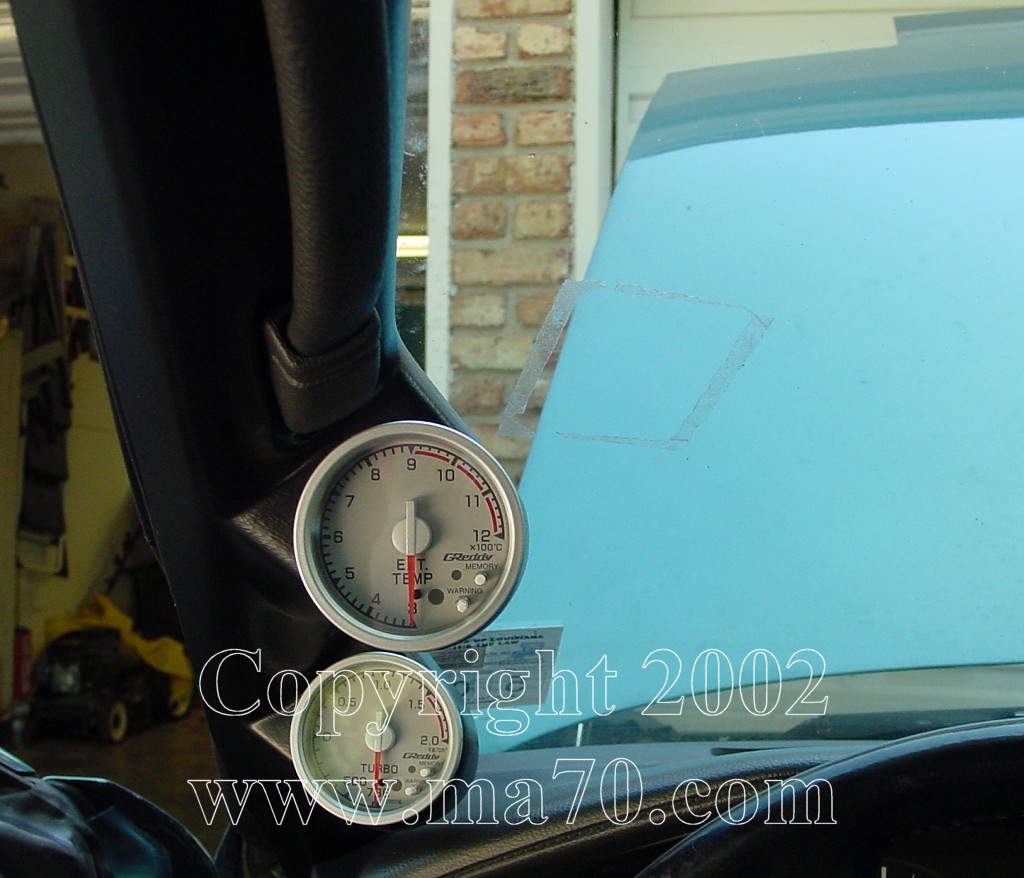
- GReddy EGT 60mm Peak/Hold (exhaust gas temperature), Turbo 60mm Peak/Hold (boost gauge) 736mmHg to 2kg/cm� (i.e. ~2bar & ~29.4psi) and Water Temperature 60mm Peak/Hold probe installed into thermostat housing. Click here for a pic of the whole setup. old setup
- GReddy/GRex shift knob I used to have the regular GRex knob but now I've got the counter-weight version.
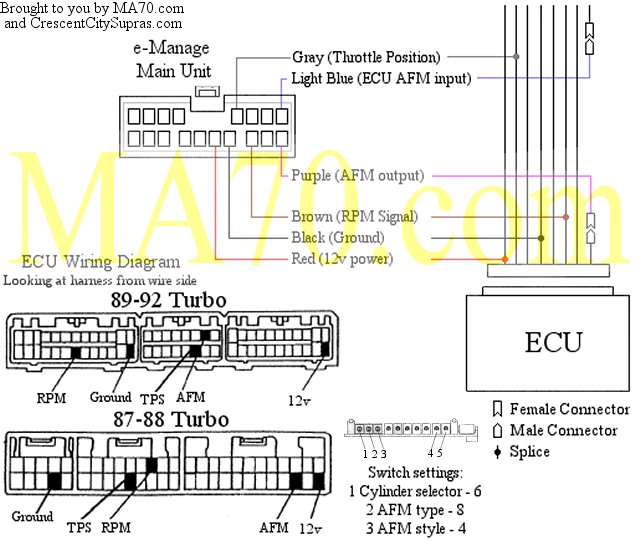
- GReddy e-Manage It can control fuel by tricking the AFM (like the S-AFR and S-AFC) but it can also modify the injector pulse to control injectors directly (like the FCON). It can also control ignition timing based on boost and vacuum. Injector size compensation, additional injector control, FCO removal, EIDS function, MAP sensor, upgraded AFM adjustment, and real time viewing tracing and logging of all inputs. All fuel and ignition maps are 16x16 with all points being adjustable. GReddy has no official support for the 7M e-Manage but I found a way to install it. Use this pic for installation My old fuel computer the HKS S-AFR allows fuel to be modified on 11 different rpm points see a pic
- GReddy Profec e-01 electronic boost controller. This bad-boy can control the e-Manage, run more boost then my old Profec B (3 bar vs 1.5) and can vary boost based on RPM. It can also data log all kinds of information (EGT or any GReddy P/H gauge output, TPS, AFM in/out, injector duty cycle, boost, solenoid duty cycle, 2 analog and 2 digital inputs of anything!, timing advance, engine RPM) for three hours. All this on a LCD screen with EL backlighting. Decided to mount it in front of the useless stock oil pressure and boost gauges. picture finally!
- HKS knocking monitor pic
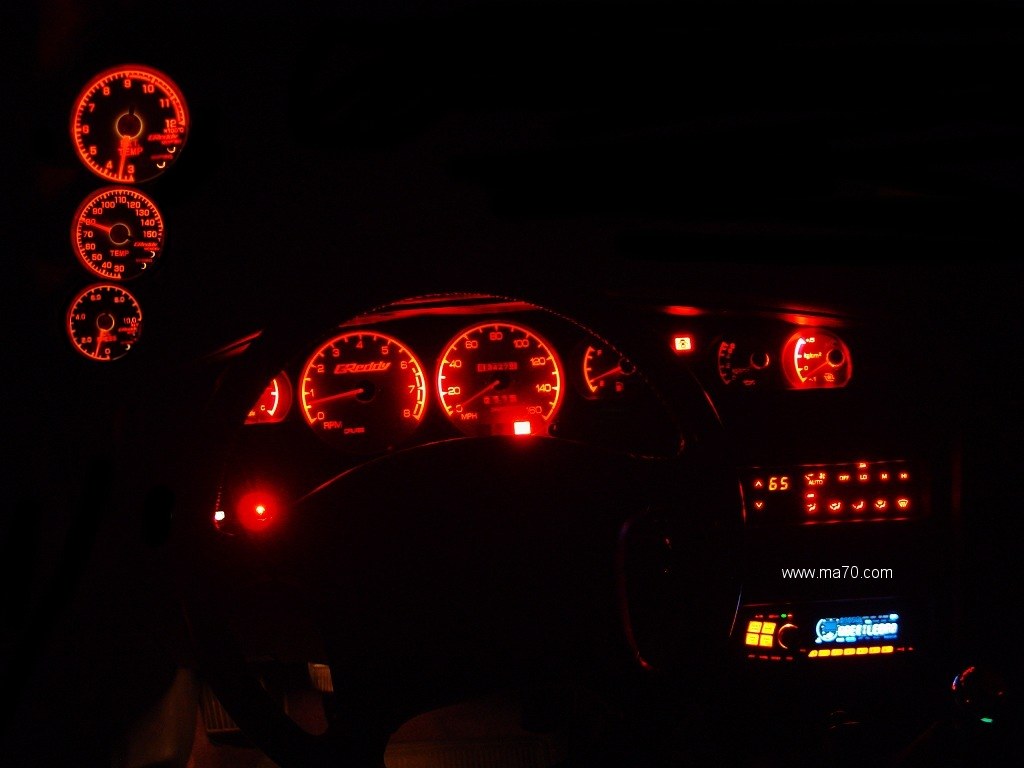
- Lotek triple pod A pillar. Click here for a pic of the whole setup. The newest redesign from Lotek made it fit perfect up top and on the sides however the base is still not quite right. It's not noticeable unless you're looking for it so I've very satisfied with the new design. Also the gauges are pointed and spaced better on the triple pillar pod. It took me a little while to get used to reading the top gauge (EGT) but now I really like the positioning. My old dual pod pillar was black but this time I went with the medium gray. Overall I'd prefer the black as it was closer to the 91-92 Shadow Gray interior.
- Marcy's IC cover plate Supposed to force air through the intercooler and radiator better by not letting air circulate around the hood latch. see a pic
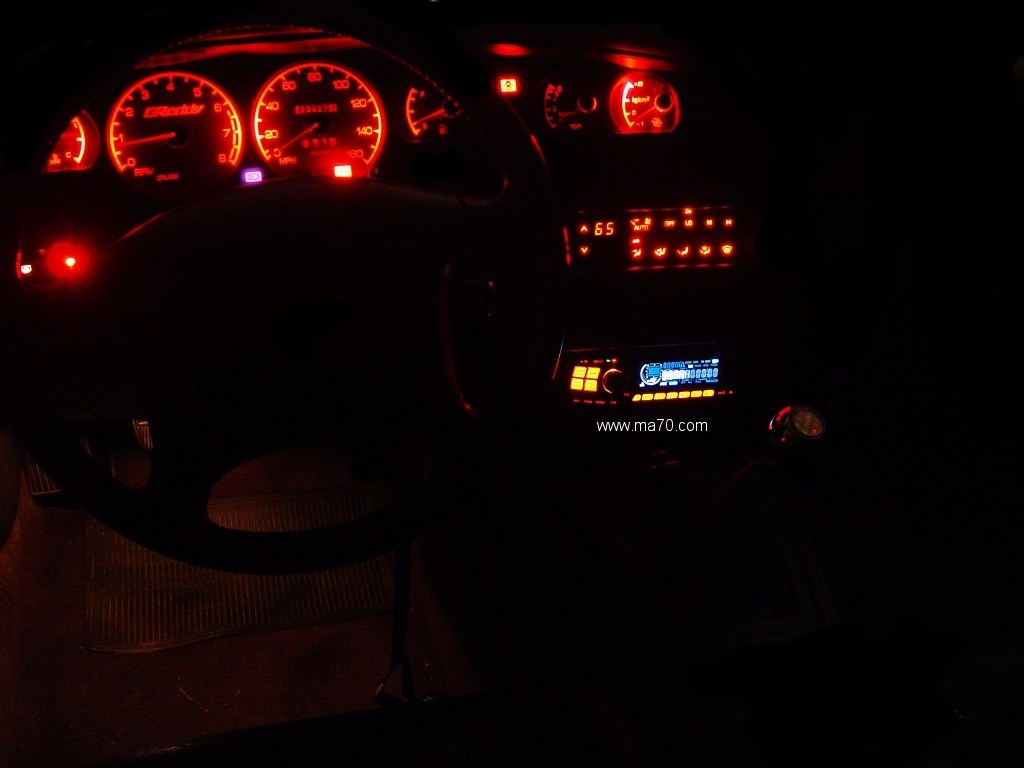
- Red interior illumination conversion with custom Speedhut silver faced gauge faces. Many months of planning and talking to different manufacturers to finish this project. See I've always wanted red illuminated gauges, I hate green illumination. There's no way I was going to buy any aftermarket gauges other then GReddy so that left me with one option for my aftermarket gauges - silver faced GReddy (the only GReddy's that illuminate red). Well then my stock black faced gauges will look mismatched with silver GReddy's so why not have a company print me some custom faces. Hell, while I'm at it, why not make the stock faces look like GReddy's. Thus the project was started. There were a few obstacles like the 26 LED's in the stock AC panel that had to be meticulously replaced (thanks to Dave again!). I even had to find a cd player that would illuminate red, I was very determined to remove all green/blue shades. I'm still working on a few last things like the stock clock and the LED's in the window switches. 8 months after I started the project it's finally complete enough to post pictures!! during the day pic at night, yummy another night shot
Braking, Rims and Tires
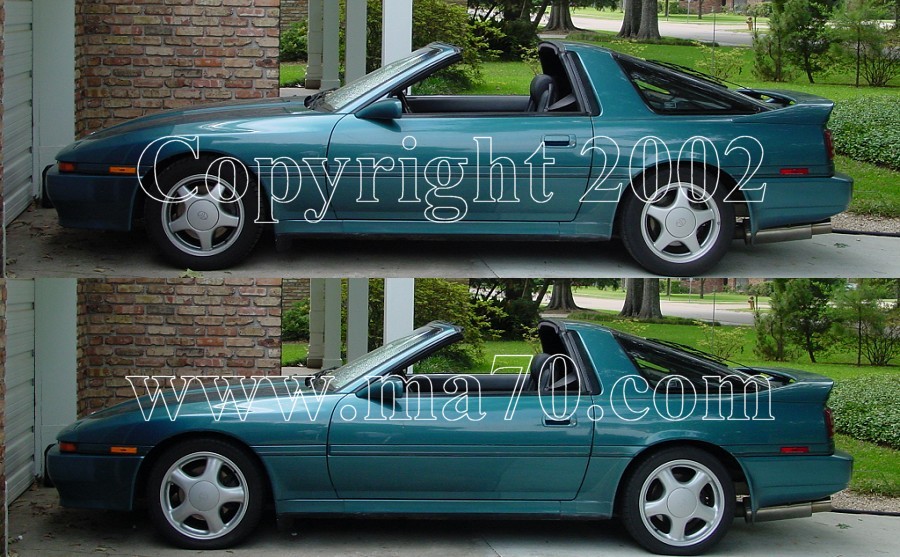
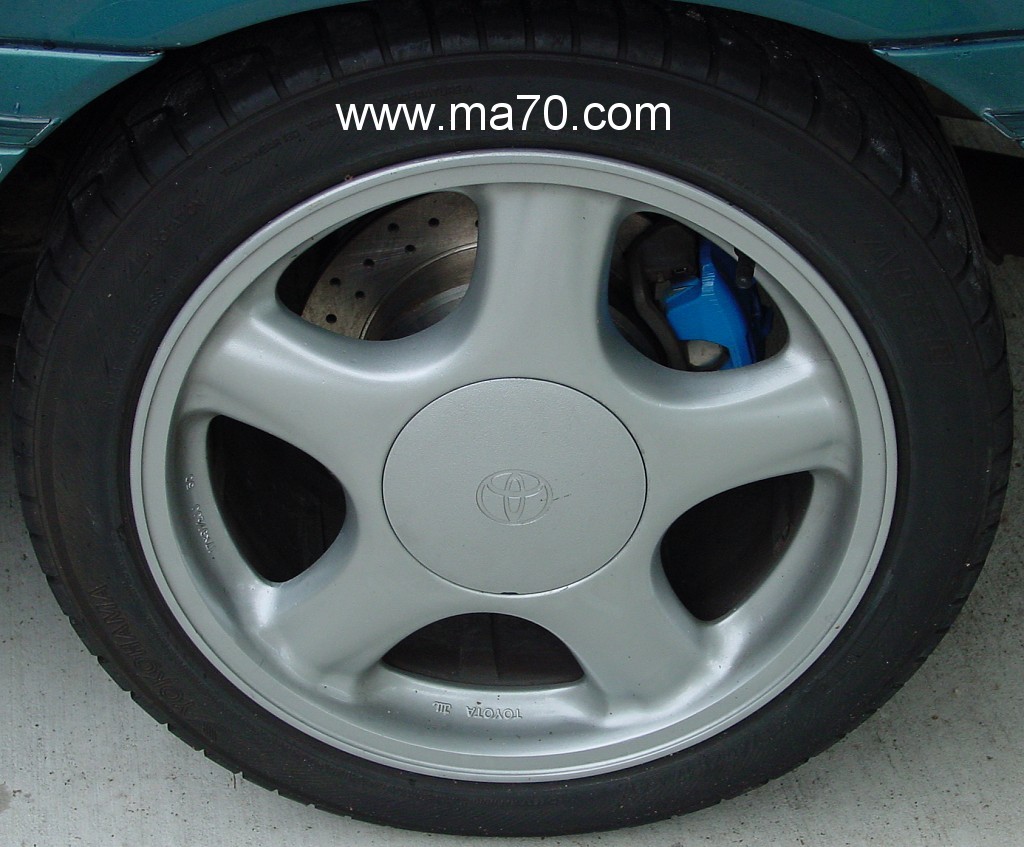
- Supra MK4 Twin Turbo 17" rims 17x8 in the front and 17x9.5 in the rear. Much larger than the 16x7's that came with the car. See a before and after pic The 17's are a different offset as you'll notice here (50mm on the MK4 rims vs 35mm on my stock rims). It sticks the rims further out which looks better to me as they sit flush with the fenders. Some things I noticed - the 17's and 16's have nearly identical center caps both of which will fit into either rim pic; because of the offset the long style (86.5-90) bolts will fit in the 17's but not the 16's if you want the center cap to fit.
- KVR cross-drilled rotors and carbon fiber pads At first the rotors were wearing very unevenly from the pads but after about a thousand miles they appear to be wearing nicely. Braking response is great, stops much better then stock. There are better brakes out there, but for the money KVR is hard to beat. an pre-install pic rear's installed, mmmm blue calipers :)
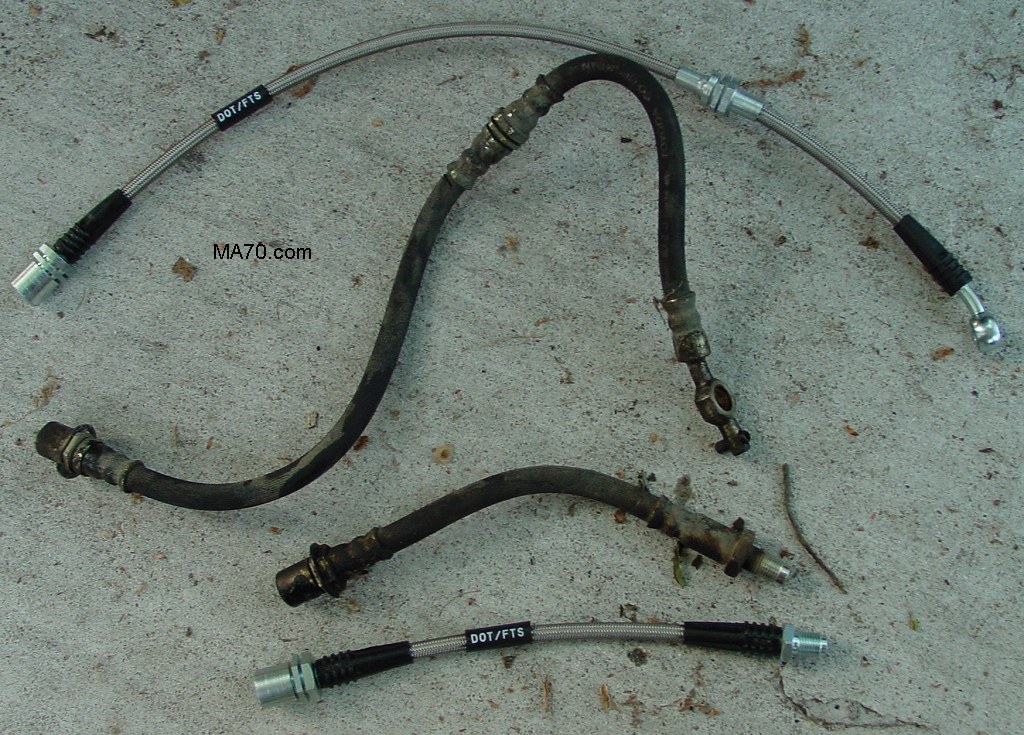
- Techna-Fit SS brake lines Pedal feel is noticeably stiffer and the brakes do not feel spongy anymore. See a picture of stock and Techna-Fit lines compared here.
- Yokohama AVS ES100 tires 235/45/17 front 255/40/17 rear Dry traction blows the A520's away, not even a close match. No more road noise! Long term update, put quite a few thousand miles on them and one day of road course action. Tread is wearing slow, still have plenty of life left. Dry traction is still excellent and very predictable. Wet traction is what I would expect from a 3,600 lb car.
- Old Tires - Yokohama A520 tires Came with the rims, they seem to be a decent tire dry but treadwear is too low for the way I drive :) Extreme road noise and low tread rating means I won't get them again. Wet traction is decent - easy to spin but they recover quickly. Did I mention the extreme road noise? I never thought a tire's road noise would drive me crazy, afterall my Supra isn't exactly a quiet car but these tires were unbelievably noisy even at 5mph. Sounded like my wheel was about to fall off.
Maintenance (some preventive) - In order of installation
- Annoying little coolant hose in the back of the engine, valve cover seals, head bolts retorque, plugs, wires, turbo swap, clutch change, fuel filter, HG swap
|
